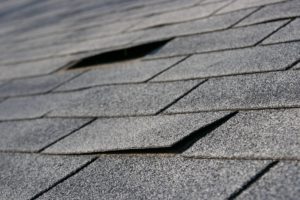
How to Repair Curled & Cuffed Roof Shingles

The roof of your home endures a lot over the years, between sunlight beating down, heavy rain falling, high winds howling, and other elements that pummel it throughout the seasons. As a result, your roof may show some signs of light wear and tear, like curled and cupped shingles. These won’t necessarily warrant a full replacement quite yet; you can bide yourself some time by repairing the curled or cupped roof shingles yourself.
Inspect Your Roof Shingles for Damage
If you have a sturdy ladder and feel comfortable going up onto your roof, then go ahead and inspect the curling or cupping shingles. Look at both sides of the shingles; if most of the decorative gravel is worn away and dark patches have appeared, then this is a sign your roof is in need of a replacement. However, if the shingles still have a reasonable coat of granules on them, then fixing them yourself might suffice for now.
Curling Roof Shingles Repair Process
Carefully lift the curling or cupping shingle and gently sweep away any loose debris using a dry paintbrush. Next, spread a layer of roofing cement over the area below the shingle with a putty knife and then firmly press the shingle flat. If there’s any exposed adhesive, scoop up some colorful granules from the gutter and sprinkle them over the excess cement. Place a brick on the shingle to weigh it down while the roofing cement dries, or nail it down by hammering a roofing nail through each corner, and then seal the nail heads with a small dab of roofing cement. Allow 24 hours for the adhesive to dry before removing the weights.
Professional Roof Replacements by Dreamstyle
While this simple fix may buy you some time, if you notice a large number of your shingles are curling, cupping, or falling off of your roof, then it may be time for a full replacement. When that time comes, reach out to the roofing professionals at Dreamstyle Remodeling for a solution you can count on. Contact us today for a roof inspection.


